Data services and mediating SOAP messages with Synapse DBReport mediator
Apache Synapse is an ESB that has been designed to be simple to configure, very fast, and effective at solving many integration and gatewaying problems. It comes with a set of ready-to-use transports and mediators.
Visit Apache synapse web for more information about message mediation.
WSO2 data services is a convenient mechanism to provide a Web service interface for data stored in some data source. Data sources such as relational databases, CSV files & MS-Excel files can be easily service enabled using Data Services.
You can find more details about WSO2 Data services from here
I got a lot of positive feedback about my previous posts (securing web services) since they helped beginners to understand and experiment with simple examples without digging in to complex details.
I thought to describe a simple scenario which demonstrates the usage of data services and synapse together. I hope the following step-by-step instructions will help most of the novice users to get started with WSO2 data services and Apache synapse in a fairly simple manner.
I am going to use the following open source software tools in this demonstration. So, please make sure you have configured them in your environment.
Apache Synapse 1.1.1 (Download)
WSO2 WSAS 2.2.1 (Download)
Apache derby 10.3.2.1 (Download)
Apache JMeter (Download)
Scenario:
A SOAP request will be sent to WSO2 WSAS to get the net salary of an employee which resides in a database. The messages will be transferred via synapse. The response SOAP message will be subjected to mediation by synapse DBreport mediator. In which, the net salary of a different employee will be updated by evaluating the net salary of the requested employee. In other words, we will get the net salary of employee A and instruct synapse to update employee B's net salary to the net salary of employee A.
Step 1
Database preparation
We should prepare the necessary database and tables as the first step. Apache derby will be used in this example.
CONNECT 'jdbc:derby://localhost:1527/employeedb;user=wsas;password=wsas;create=true';
insert into employee values ('Sean','1',1000.00);
insert into employee values ('John','1',3000.00);
insert into employee values ('David','1',2000.00);
Next, I'm going to create a data service using the above data source. Data services allow users to expose the relational data as web services so that they can be accessed and manipulated in programming language independent manner.
Step 2
Create a data service
Please make sure the derby client driver is available in your WSAS instance. Copy derby_home/lib/derbyclient.jar to WSAS_HOME/lib.
Install WSO2 WSAS if it is not already installed. start WSO2 WSAS using WSAS_HOME/bin/wso2wsas.bat
Access WSAS management console (https://localhost:9443) where we can configure our data service through UI.
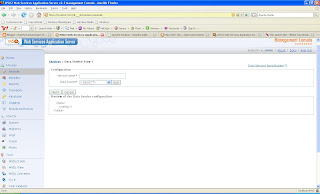
Go to 'Services and service group management' page and click on 'Define data service' link. You will get a page as given below.

Enter 'Synapsedataservice' as the service name. Select 'RDBMS' as the data source. A pop-up window will be displayed where we can configure data base details.
Driver Class = org.apache.derby.jdbc.ClientDriver
JDBC URL = jdbc:derby://localhost:1527/employeedb
user name= wsas
password = wsas
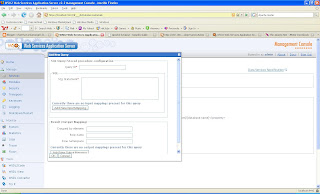
Click on the 'Next' after configuring data source details. The second step of the data service configuration will be displayed. Click on 'New query' button. The following pop-up window will appear.

Enter the following details in the above window.
Query ID=Empsal
SQL Statement = select * from employee where name = ?
Click on ' add new input mapping' and enter followings.
You should observe the simplicity of exposing relational data using WSO2 Data services. Lets see how we can use Apache Synapse to do some mediation in messages passing through it.
Step 4
Creating Synapse configuration
Install Synapse1.1.1 (just unzip the binary distribution). Synapse provides a xml configuration file to define the mediation rules using synpase configuration language. Open Synapse_home/repository/conf/synapse.xml.
Remove the existing contents of that file and add the following configuration.
<definitions xmlns="http://ws.apache.org/ns/synapse">
<sequence name="main">
<in>
<send>
<endpoint>
<address uri="http://localhost:9762/services/Synapsedataservice"/>
</endpoint>
</send>
</in>
<out>
<log level="custom">
<property name="text"
value="** Reporting to the Database **"/>
</log>
<dbreport>
<connection>
<pool>
<driver>org.apache.derby.jdbc.ClientDriver</driver>
<url>jdbc:derby://localhost:1527/employeedb;create=false</url>
<user>wsas</user>
<password>wsas</password>
</pool>
</connection>
<statement>
<sqlupdate employee set netsalary=? where name='John'</sql>
<parameter expression="//datas2:employees/datas2:employee/datas2:netsalary"
xmlns:datas2="http://ws.wso2.org/dataservice" type="DOUBLE"/>
</statement>
</dbreport>
<send/>
</out>
</sequence>
</definitions>
Here, the request message pass through synapse will be directed to the data service endpoint without doing any mediation. It is defined in the <in/> element.
The SOAP response will be transferred via two different mediators.
Log - when the soap response reaches synapse, it just logs the message as defined.
dbreport - writes information to a Database, using the specified insert SQL statement.
In this configuration, we evaluate the response SOAP message using an XPath expression and get the net salary of the employee. Then we update the net salary of employee John with that.
Now you can start synapse with the above configuration by running synapse.bat.
To see how this works, we need to send a SOAP request message to Synapse. Apache Jmeter can easily be used to transmit a soap message.
Step 5
Test message mediation
Install jmeter in your system (Just unzip jmeter binary distribution). Run jmeter.bat.
Create a thread group and add SOAP/XML-RPC request sampler. (Please read http://wso2.org/library/1085 if you are not familiar with testing web services using Jmeter)
Add the following soap request in to the SOAP/XML-RPC data section.
<soapenv:envelope soapenv="http://schemas.xmlsoap.org/soap/envelope/">
<soapenv:body>
<axis2ns5:empsalop axis2ns5="http://ws.wso2.org/dataservice">
<name>Sean</name>
</axis2ns5:empsalop>
</soapenv:body>
</soapenv:envelope>
You may have wondered how I captured the above request Soap message. There are several different approaches.
1. write a java client and invoke the data service. Capture the message using apache Tcpmon
2. Enable Soap Tracing in the WSAS management console. As we did above, invoke the service in RestFul manner. Then access the SoapTracer in WSAS management console and copy the soap request. (This will be the easiest method)
Enter 'http://localhost:8080' as the URL in SOAP/XML-RPC request.
Enable 'Send SoapAction' and enter 'urn:EmpSalOp'
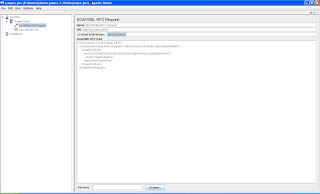
If everything is correct, you should see the following in your Jmeter console.

Run the sampler. You may check the synapse console where you can monitor the message mediation.
Lets see whether the net salary of John is updated as expected. Open the ij utility of Derby and issue the following SQL statement.
select * from employee;
You should notice that the net salary of John and Sean are same.
In this post, we looked at the WSO2 data services and Apache Synapse using a simple scenario. You will be able to improve the above scenario by applying more mediation rules.
Visit Apache synapse web for more information about message mediation.
WSO2 data services is a convenient mechanism to provide a Web service interface for data stored in some data source. Data sources such as relational databases, CSV files & MS-Excel files can be easily service enabled using Data Services.
You can find more details about WSO2 Data services from here
I got a lot of positive feedback about my previous posts (securing web services) since they helped beginners to understand and experiment with simple examples without digging in to complex details.
I thought to describe a simple scenario which demonstrates the usage of data services and synapse together. I hope the following step-by-step instructions will help most of the novice users to get started with WSO2 data services and Apache synapse in a fairly simple manner.
I am going to use the following open source software tools in this demonstration. So, please make sure you have configured them in your environment.
Apache Synapse 1.1.1 (Download)
WSO2 WSAS 2.2.1 (Download)
Apache derby 10.3.2.1 (Download)
Apache JMeter (Download)
Scenario:
A SOAP request will be sent to WSO2 WSAS to get the net salary of an employee which resides in a database. The messages will be transferred via synapse. The response SOAP message will be subjected to mediation by synapse DBreport mediator. In which, the net salary of a different employee will be updated by evaluating the net salary of the requested employee. In other words, we will get the net salary of employee A and instruct synapse to update employee B's net salary to the net salary of employee A.
Step 1
Database preparation
We should prepare the necessary database and tables as the first step. Apache derby will be used in this example.
- Start derby network server
- Create a database
CONNECT 'jdbc:derby://localhost:1527/employeedb;user=wsas;password=wsas;create=true';
- Create a table and insert data
insert into employee values ('Sean','1',1000.00);
insert into employee values ('John','1',3000.00);
insert into employee values ('David','1',2000.00);
Next, I'm going to create a data service using the above data source. Data services allow users to expose the relational data as web services so that they can be accessed and manipulated in programming language independent manner.
Step 2
Create a data service
Please make sure the derby client driver is available in your WSAS instance. Copy derby_home/lib/derbyclient.jar to WSAS_HOME/lib.
Install WSO2 WSAS if it is not already installed. start WSO2 WSAS using WSAS_HOME/bin/wso2wsas.bat
Access WSAS management console (https://localhost:9443) where we can configure our data service through UI.
Go to 'Services and service group management' page and click on 'Define data service' link. You will get a page as given below.

Enter 'Synapsedataservice' as the service name. Select 'RDBMS' as the data source. A pop-up window will be displayed where we can configure data base details.
Driver Class = org.apache.derby.jdbc.ClientDriver
JDBC URL = jdbc:derby://localhost:1527/employeedb
user name= wsas
password = wsas
Click on the 'Next' after configuring data source details. The second step of the data service configuration will be displayed. Click on 'New query' button. The following pop-up window will appear.

Enter the following details in the above window.
Query ID=Empsal
SQL Statement = select * from employee where name = ?
Click on ' add new input mapping' and enter followings.
You should observe the simplicity of exposing relational data using WSO2 Data services. Lets see how we can use Apache Synapse to do some mediation in messages passing through it.
Step 4
Creating Synapse configuration
Install Synapse1.1.1 (just unzip the binary distribution). Synapse provides a xml configuration file to define the mediation rules using synpase configuration language. Open Synapse_home/repository/conf/synapse.xml.
Remove the existing contents of that file and add the following configuration.
<definitions xmlns="http://ws.apache.org/ns/synapse">
<sequence name="main">
<in>
<send>
<endpoint>
<address uri="http://localhost:9762/services/Synapsedataservice"/>
</endpoint>
</send>
</in>
<out>
<log level="custom">
<property name="text"
value="** Reporting to the Database **"/>
</log>
<dbreport>
<connection>
<pool>
<driver>org.apache.derby.jdbc.ClientDriver</driver>
<url>jdbc:derby://localhost:1527/employeedb;create=false</url>
<user>wsas</user>
<password>wsas</password>
</pool>
</connection>
<statement>
<sqlupdate employee set netsalary=? where name='John'</sql>
<parameter expression="//datas2:employees/datas2:employee/datas2:netsalary"
xmlns:datas2="http://ws.wso2.org/dataservice" type="DOUBLE"/>
</statement>
</dbreport>
<send/>
</out>
</sequence>
</definitions>
Here, the request message pass through synapse will be directed to the data service endpoint without doing any mediation. It is defined in the <in/> element.
The SOAP response will be transferred via two different mediators.
Log - when the soap response reaches synapse, it just logs the message as defined.
dbreport - writes information to a Database, using the specified insert SQL statement.
In this configuration, we evaluate the response SOAP message using an XPath expression and get the net salary of the employee. Then we update the net salary of employee John with that.
Now you can start synapse with the above configuration by running synapse.bat.
To see how this works, we need to send a SOAP request message to Synapse. Apache Jmeter can easily be used to transmit a soap message.
Step 5
Test message mediation
Install jmeter in your system (Just unzip jmeter binary distribution). Run jmeter.bat.
Create a thread group and add SOAP/XML-RPC request sampler. (Please read http://wso2.org/library/1085 if you are not familiar with testing web services using Jmeter)
Add the following soap request in to the SOAP/XML-RPC data section.
<soapenv:envelope soapenv="http://schemas.xmlsoap.org/soap/envelope/">
<soapenv:body>
<axis2ns5:empsalop axis2ns5="http://ws.wso2.org/dataservice">
<name>Sean</name>
</axis2ns5:empsalop>
</soapenv:body>
</soapenv:envelope>
You may have wondered how I captured the above request Soap message. There are several different approaches.
1. write a java client and invoke the data service. Capture the message using apache Tcpmon
2. Enable Soap Tracing in the WSAS management console. As we did above, invoke the service in RestFul manner. Then access the SoapTracer in WSAS management console and copy the soap request. (This will be the easiest method)
Enter 'http://localhost:8080' as the URL in SOAP/XML-RPC request.
Enable 'Send SoapAction' and enter 'urn:EmpSalOp'
If everything is correct, you should see the following in your Jmeter console.

Run the sampler. You may check the synapse console where you can monitor the message mediation.
Lets see whether the net salary of John is updated as expected. Open the ij utility of Derby and issue the following SQL statement.
select * from employee;
You should notice that the net salary of John and Sean are same.
In this post, we looked at the WSO2 data services and Apache Synapse using a simple scenario. You will be able to improve the above scenario by applying more mediation rules.


Comments
http://blog.livedoor.jp/lljj332
http://shoes-puma.jugem.jp
http://poloshirts--myfashion.blogspot.com
http://blades.blogsome.com
http://gillettefusion.edublogs.org
http://gilletterazor.blog126.fc2.com
http://poloclothing.blogsome.com
http://venuschinawholesale.easyjournal.com
http://pumaspeedcat.blogharbor.com
http://venus666.blog.co.uk