How to deploy Apache Axis2 on GlassFish Application Server
I have demonstrated the steps to deploy Apache Axis2 on BEA WebLogic, IBM WebSphere, JBoss and Resin application servers in my previous posts. This series is not complete unless the steps to deploy Axis2 on GlassFish server are explained.
Lets see how Axis2 can be deployed on GlassFish server. It is quite straightforward and similar to the other application servers we have discussed so far.
Pre-requisites:
Download and install the latest version of GlassFish server from here.
Step 1
Start GlassFish server.
i.e:- Go to GlassFish_Home/bin and run asadmin script as follows.
asadmin start-domain domain1
This will start GlassFish server in domain1.
Step 2
Download Axis2.war from here
Step 3
Access GlassFish administration console (In a browser, access http://localhost:4848).
Log in to administration console (Default username=admin, password=adminadmin).
Step 4
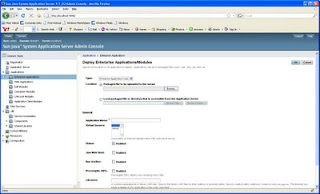
In the left navigation menu of the GlassFish admin console, select Enterprise Applications and click on Deploy.
You will be directed to the following screen.

Select 'Web Application(*.war)' as the Type from the drop down list.
Enter the location of the downloaded axis2.war.
Leave the other settings intact and click OK.
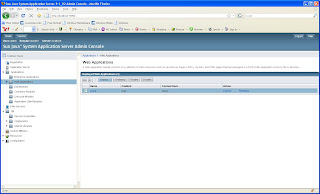
You will be directed to the "Web Applications" page.

Select Axis2 from the table and click on Launch.
Axis2 administration page will be displayed.
Step 5
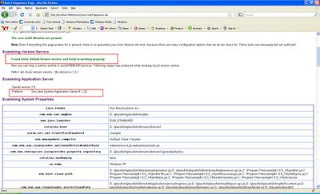
Verify the status of installation. Click on 'Validate' link of Axis2 admin page. You should see the following 'Axis2 Happiness' page.

Now you can log in to Axis2 administration page and start deploying services.
Lets see how Axis2 can be deployed on GlassFish server. It is quite straightforward and similar to the other application servers we have discussed so far.
Pre-requisites:
Download and install the latest version of GlassFish server from here.
Step 1
Start GlassFish server.
i.e:- Go to GlassFish_Home/bin and run asadmin script as follows.
asadmin start-domain domain1
This will start GlassFish server in domain1.
Step 2
Download Axis2.war from here
Step 3
Access GlassFish administration console (In a browser, access http://localhost:4848).
Log in to administration console (Default username=admin, password=adminadmin).
Step 4
In the left navigation menu of the GlassFish admin console, select Enterprise Applications and click on Deploy.
You will be directed to the following screen.

Select 'Web Application(*.war)' as the Type from the drop down list.
Enter the location of the downloaded axis2.war.
Leave the other settings intact and click OK.
You will be directed to the "Web Applications" page.

Select Axis2 from the table and click on Launch.
Axis2 administration page will be displayed.
Step 5
Verify the status of installation. Click on 'Validate' link of Axis2 admin page. You should see the following 'Axis2 Happiness' page.

Now you can log in to Axis2 administration page and start deploying services.


Comments